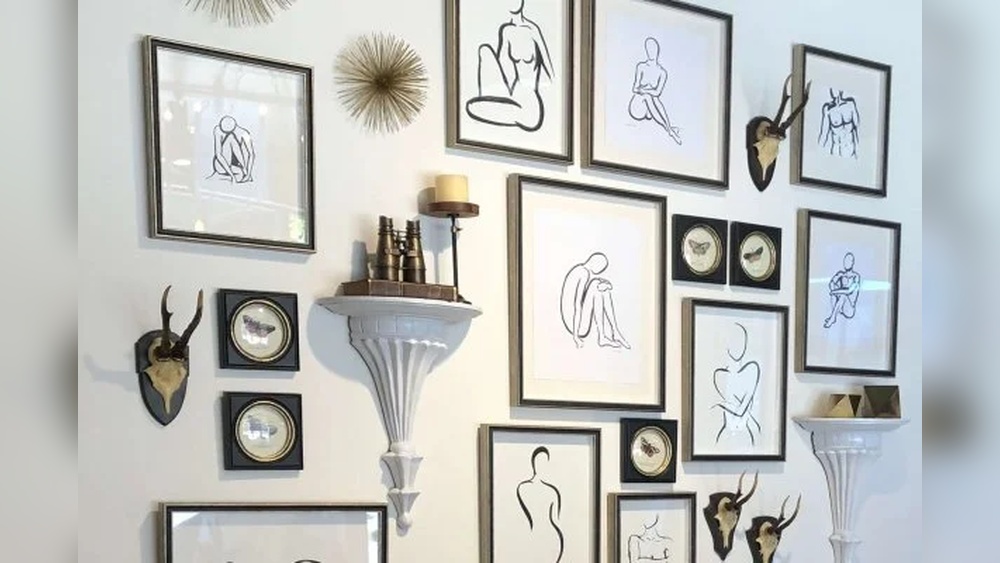
Are your walls feeling bare or cluttered? How you organize your wall art can completely change the look and feel of your space.
Imagine walking into a room where every piece of art catches your eye in just the right way, balanced, stylish, and full of personality. You don’t need to be an expert or spend hours figuring it out. This guide will show you simple, practical steps to arrange your wall art so it feels just right for your home.
Keep reading, and you’ll discover easy tips that make your walls look amazing and reflect your style perfectly.
Choosing The Right Wall Art
Choosing the right wall art is more than just picking something that looks nice. It sets the tone for your space and reflects your personality. When you select art thoughtfully, it can transform a room from ordinary to inspiring.
Selecting Art Styles
Start by identifying styles that resonate with you. Do you prefer modern abstracts, classic portraits, or maybe nature-inspired prints? Your choice should feel natural and comfortable, not forced.
Think about how the style of the art will fit with your daily life. For instance, if you often entertain guests, bold and vibrant pieces might spark great conversations. On the other hand, calm and minimalistic art can create a peaceful retreat in a bedroom.
Matching Art To Room Themes
Each room has its own vibe, so your wall art should support that mood. A rustic kitchen might benefit from vintage food posters, while a sleek office calls for clean lines and geometric shapes.
Ask yourself what the room’s purpose is and how the art can enhance it. You don’t want a chaotic gallery wall in a space meant for relaxation, nor a bland single piece where energy is needed.
Considering Color Schemes
Colors in your wall art can either blend with your room or stand out as a focal point. Look at your existing furniture and decorations to find colors that complement or contrast effectively.
Sometimes, adding a pop of color with a bright painting can lift a neutral room instantly. Other times, sticking to the room’s palette keeps things cohesive and calming.
Have you ever noticed how a well-chosen piece of art can change the feeling of a room? That happens because the right style, theme, and color work together to create a space that feels just right for you.

Credit: www.youtube.com
Planning Your Wall Space
Planning your wall space is the first step to organize wall art well. It helps you use space smartly and create a neat look. Good planning avoids clutter and highlights your art pieces.
Start by knowing your wall size and the best spots for your art. This makes your wall art stand out and fit your room style.
Measuring Wall Dimensions
Measure the height and width of your wall carefully. Use a tape measure for exact numbers. Write down these dimensions to use later. Knowing wall size helps you pick the right art size and layout.
Check for any obstacles like windows or switches. These affect where you can hang art. Mark these spots on your wall plan.
Deciding On Layouts
Choose a layout that fits your wall and art pieces. Popular layouts include grids, rows, or salon style. Think about balance and spacing between each piece.
Consider the height where people usually look. Keep art at eye level for best view. Mix sizes and shapes for an interesting display.
Using Templates And Mockups
Create paper templates of your art pieces. Cut them to the same size as your frames. Tape them on the wall to test different layouts.
This helps you see how your art looks before making holes. You can move pieces around until you find the best fit. Use a camera to take photos of your layout for reference.
Creating Balanced Arrangements
Creating balanced arrangements is key to a beautiful wall art display. It helps the eye move smoothly across the wall. Balance makes your space feel calm and organized. Achieving this balance involves mixing sizes, grouping similar pieces, and balancing colors and textures. Each step plays a role in making your wall art look thoughtful and stylish.
Mixing Sizes And Shapes
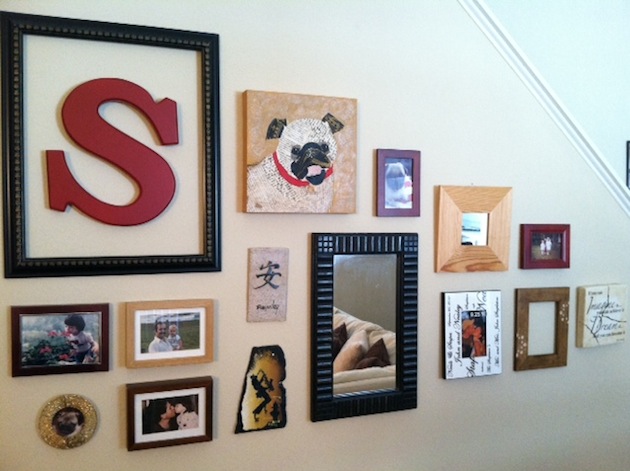
Use different sizes and shapes to create interest. Large pieces grab attention. Small pieces add detail and fill gaps. Mix squares, rectangles, and circles. This variety keeps the arrangement lively. Avoid placing all large or all small pieces together. Spread them out evenly for a balanced look.
Grouping Similar Pieces
Group art with similar themes or styles. This creates a sense of unity. You can group photos, paintings, or prints that share colors or subjects. Keep a small space between pieces to avoid clutter. Groupings should feel connected but not crowded. This makes the wall art easy to enjoy.
Balancing Colors And Textures
Balance bright and neutral colors across the arrangement. Spread bold colors evenly to avoid heavy spots. Mix smooth, glossy frames with rough, matte finishes. Texture adds depth and interest. A balanced mix of colors and textures keeps the display fresh and appealing.
Hanging Techniques And Tools
Hanging wall art correctly enhances your room’s look instantly. Using the right tools and methods helps your art stay safe and straight. This section covers key techniques and tools for hanging wall art.
Choosing The Right Hardware
Select hardware based on the wall type and art weight. For drywall, use anchors or screws designed for drywall. Heavy frames need strong hooks or wall anchors. Picture wire works well for framed art. Avoid nails alone for heavy pieces. Use hooks with weight ratings to avoid damage.
Using Level And Measuring Tools
Use a level to keep art straight. Tape measures help center pieces on the wall. Mark spots lightly with a pencil before drilling or nailing. A laser level offers extra precision for multiple pieces. Check measurements twice to avoid errors.
Tips For Secure Hanging
Secure hooks tightly into the wall. Use two hooks for large or wide frames. Hang art slightly above eye level for best viewing. Avoid hanging art in direct sunlight to protect colors. Check stability after hanging to prevent falls.
Incorporating Lighting
Lighting plays a key role in organizing wall art. It brings out the colors, shapes, and details of each piece. Good lighting makes art stand out and creates a warm, inviting space. Choosing the right lighting can change how people see your art.
Highlighting Art With Spotlights
Spotlights focus light directly on a piece. They create a bright, clear view of your artwork. Use adjustable spotlights to control where the light hits. This helps highlight textures and colors. Position spotlights so the light spreads evenly without harsh edges.
Using Natural Light Effectively
Natural light gives art a fresh and soft look. Place art near windows but not in direct sunlight. Too much sun can fade colors over time. Use sheer curtains to soften strong sunlight. Natural light changes during the day, adding life to your art.
Avoiding Glare And Shadows
Glare makes it hard to see art clearly. Avoid placing lights where they reflect off glass frames. Use matte glass or no glass to reduce glare. Shadows can hide parts of your art. Position lights so shadows fall away from the artwork. Balance light sources to keep the display bright and clear.
Credit: www.the-organizing-boutique.com
Refreshing And Updating Displays
Refreshing and updating your wall art keeps your space lively and inviting. Changing displays often brings new energy and interest to a room. It also allows your art to reflect your mood and style over time.
Seasonal And Thematic Changes
Switch art pieces to match the seasons or special themes. Use bright, floral prints in spring and warm, cozy images in fall. Holiday-themed art can add festive spirit during celebrations. These changes make your space feel fresh and timely.
Rotating Art Pieces
Rotate your art regularly to showcase different pieces. This keeps your walls exciting without buying new art all the time. Store unused pieces safely and swap them every few months. Rotating art also highlights unique styles and colors in your collection.
Incorporating New Trends
Add a few trendy pieces to update your display. Simple patterns or popular colors can refresh the look. Choose trends that match your existing decor to avoid clashing. Updating with trends helps your space feel modern and stylish.
Frequently Asked Questions
How Do I Choose The Right Wall Art Layout?
Start by measuring your wall space. Consider the size and style of your art. Use templates or paper cutouts to visualize placement. Group pieces by theme or color for cohesion. Always maintain balance and avoid overcrowding.
What Tools Are Best For Hanging Wall Art?
Use a level, tape measure, and pencil for precise placement. Picture hooks or wall anchors suit different wall types. A stud finder helps secure heavier pieces. Avoid nails alone for safety and durability.
How Can I Mix Different Art Styles Effectively?
Combine different styles by uniting colors or themes. Use similar frames or mats to create harmony. Balance large and small pieces to avoid visual chaos. Keep a consistent arrangement pattern for flow.
What Is The Ideal Height To Hang Wall Art?
Hang art at eye level, roughly 57 to 60 inches from the floor. For groupings, center the cluster at this height. Adjust based on furniture height to maintain visual balance.
Conclusion
Organizing wall art brings life to any room. It shows your style and personality clearly. Choose frames and layouts that fit your space well. Keep balance by mixing sizes and shapes carefully. Regularly update your display to keep it fresh.
Small changes can make a big difference. Enjoy the process of creating your own art gallery. Your walls will tell a story worth sharing.
